How to set up a auto-reply sieve filter in Nextcloud Mail
Introduction
Most out-of-office auto-replies and similar functionality for email is implemented with a technology called sieve filters. These are small scripts on the mailserver that every incoming email is matched against, and that can do things like auto-replies, sorting into subfolders, forwarding to other email addresses, and much more.
This guide shows how to enable the sieve interface in Nextcloud Mail, and how to add an auto-reply.
Sieve in Nextcloud Mail
Go into your Nextcloud Mail app (1), and click on the 3-dot-menu next to the email account you want to configure sieve for (2).
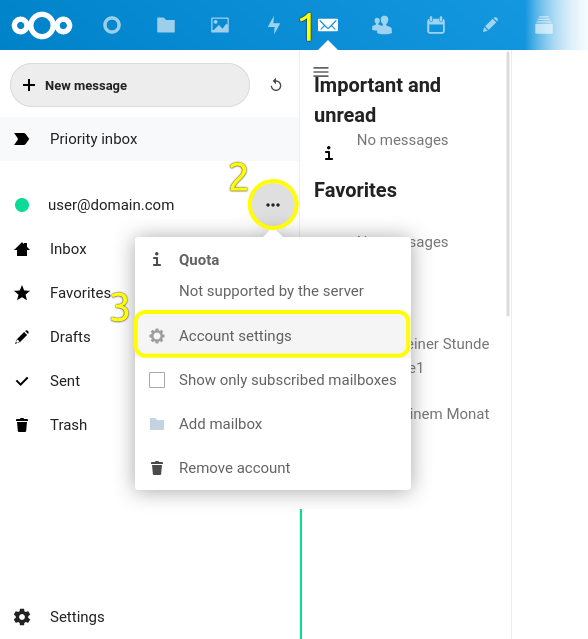
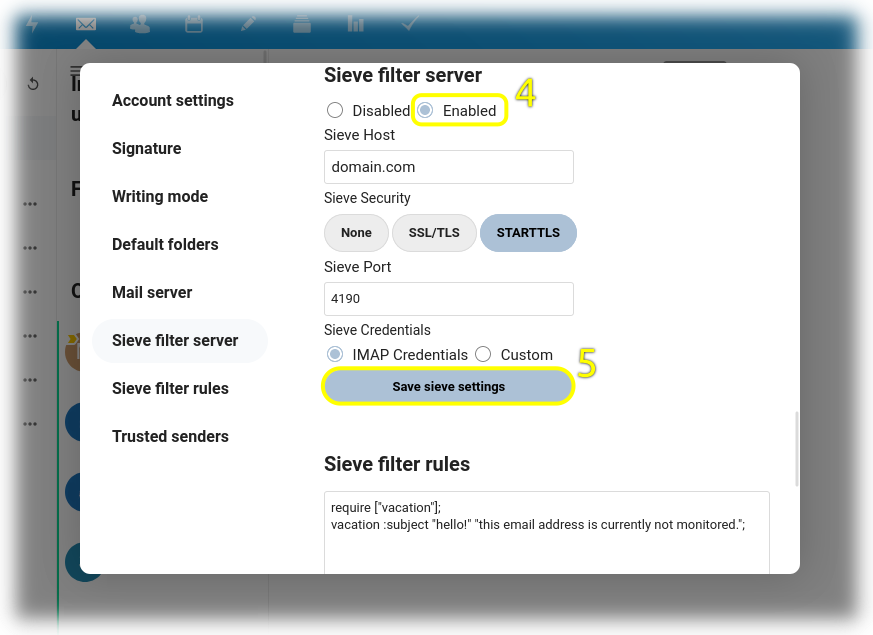
Click on Account settings (3), and in the new dialog, scroll down to Sieve filter server.
Check that it is enabled (4), and if not, select enabled and click Save sieve settings (5).
Scroll further down to Sieve filter rules, add your rules (6), e.g.,
require ["vacation"];
vacation :subject "hello!" "this email address is currently not monitored.";
and click Save sieve script (7).
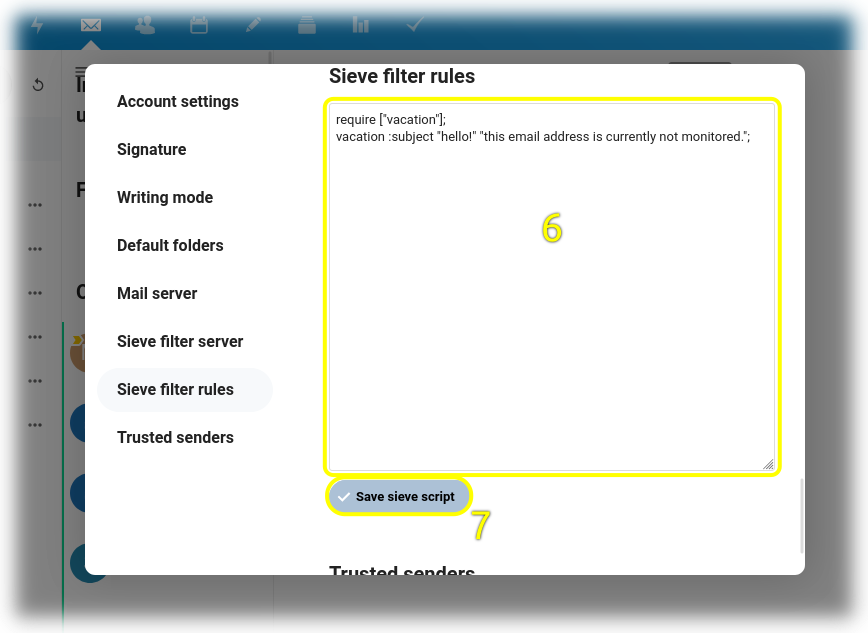
In this example, an auto-reply with the subject line “hello!” and message body “this email address is currently not monitored.” was added. You can modify those texts to your needs, and if you want to learn more about sieve scripts you can check out sieve.info to find tutorials and examples for various use cases.